It's an awesome alternative to doing hand-painted nail art on your nails. You can work on a flat surface instead of on your nails & you don't have problems with applying on your dominant hand! So your left hand & right hand nails will be equally neat :) Check it out! All you need are your nail polishes and a sandwich bag!
 |
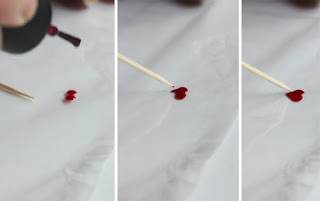
| Just start Drawing on your sandwich bag with your nail polishes, use whatever tools you would typically use to achieve the details, like striper brushes, toothpicks, etc. |
 |
I decided to start with simple hearts & just doodled more things on the sheet as I went.
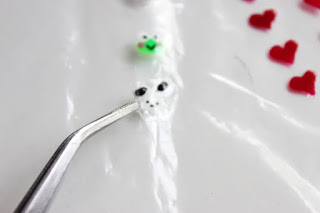
Eventually I started drawing sanrio characters, ha ha |
 |
| A helpful tip that I learned was to do a topcoat of clear nail polish over & around your decal design. |
 |
| Just cure your GEL design with LED or UV light. But if you're using regular polish, let your decals dry for SUPER long, like a few hours. After they're dry, it should be easy to just bend the sandwich bag and then peel the corner of topcoat with some tweezers! The topcoat acts as a border that you can start peeling from so that you don't ruin the actual design of your decal! |
 |
| You now have decals! |
 |
| To apply, just put a coat of fresh nail polish on & stick the decal on your still-wet nail. Make sure to press all the clear edges down so that you don't have any bubbly spots. Then put on some topcoat & you're done! Pretty cool right? |


No comments:
Post a Comment